When we were in Texas we made a visit to IKEA where we found a clearance wall light with out a shade. I could not find one at the stores that had a ring instead of clamping onto the bulb, and began to wonder if we had wasted our money on the lamp. I finally found one the right size with the right ring on top to fit. However, it was in a beige and I wanted a white pleated look. So here is the process of remaking it.
 |
| First I took off all the glued on pieces |
 |
| Next I pulled off the inside lining, which was glued, leaving three spots where it was attached to the inside ring. Then I pulled off the outside fabric, which was also glued. |
 |
| I picked up a piece of white material from JoAnns for 67 cents, cut it to size and ironed in pleats. |
 |
| I also pinned the pleats. This is a view of the bottom side of the piece. Next I basted across the top and bottom of the pleats with my sewing machine about a 1/4 inch from the edge. |
 |
| Using my trusty glue gun, I glued the bottom pleats to the frame of the shade. That was after I pinned the whole thing to the frame to check on fit. If I had it to do again I would have glued the top first and then spread the pleats out on the larger bottom. As it was I pulled the pleats a bit tighter on top and then glued. |
 |
| At the end I glued the edge under about 1/4 inch and glued it down over the beginning edge. I had begun on one of the metal bars that joins the top and bottom of the frame, so that gave some stability. Then I glued the inside lining to the bottom ring of the frame, pulling it around the outside of the shade about 1/4 inch. Next I pulled the lining tight and glued it down to the top bar, pulling it over the pleated material on the outside. Finally I glued white bias tape to cover the rough edges. |
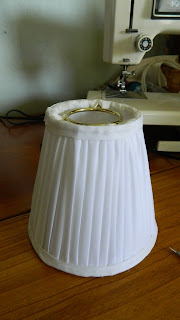 |
| Here it is completed. The only other thing I did to it was to find another ring that was the right circumference for the lamp and wire it to the inside of that top ring. |
 |
| Now I have great lighting for my sewing area. Cost of the lamp at IKEA was just over $10. The shade cost $2 at a thrift store, and the materials to recover it were about $2 bringing the grand total for this light to $14. I only saved $1 over the cost of a complete IKEA lamp, but when we bought it we did not know finding a replacement shade would prove to be so difficult. I did have fun making it though. |


No comments:
Post a Comment